Procedural generation of floor texture as pixel art
Last updated on
Contents
A bit of context
A few months ago, I started to do some pixel art here and there. Since I wanted to get better at it, I looked up for some tutorials. I found a lot of them and some were really well made, especially those from @Sadface_RL. They are easy to understand and to follow. I got nice looking results within a minimum amount of steps.
There are only a few easy steps to follow to get a pretty result. So, I thought it could be nice to create some kind of pixel art generators, be it for floor, grass or lightning based on those tutorials.
After taking some time before working on it, I decided to start with an easy one, a floor texture generator:
Libraries
My goal is to make an algorithm that generate step by step a pixel art floor texture.
With that in mind, I don’t intend to code everything from scratch.
Konva.js - Drawing
I need to draw and generate an image for the floor texture. To that end, I am using Konva.js which is a 2D framework over the Canvas API.
I have already used the vanilla Canvas API in previous projects and it was an interesting experience, and definitely a useful one as well. It was also painful. That’s why I’ll be trying out Konva for this time.
seedrandom.js - Seeded inputs
When it comes to generation, you have procedural generation and random generation among others. 1
- Procedural generation
“Procedural generation involves taking a specified input, transforming or using that input to create an output purely through code manipulation. This can be anything from taking a seed value (string name or a number) and generating a “random” level based on it. Or generated dynamic textures. Or figuring out the walking patterns of completely dynamic creatures as Spore did. These are procedural, but not necessarily random.”
- MathDPS
- Random generation
“Random generation could easily follow the same routes as procedural generation, but rely more heavily on randomly generated numbers from whatever source you desire. So your results would be wilder and more unpredictable, but still follow within the constraints of your algorithm.”
- MathDPS
In this specific case, I’m making procedural generation. The main reason is that I want to be able to spot problems and be able to reproduce them fast. If I know the input, I know I will get the same result.
I can use Math.random from the built-in objects of Javascript and tweak it a bit to generate seeded inputs that I will be using throughout the algorithm, but instead I will be using seedrandom.js because it does the job well.
One can create a seeded random number generator as easy as this:
const seed = "this is the seed";
const genRnd = new Math.seedrandom(seed);
Algorithm
Colors on the different gifs and images are far from the best colors to use to have a good looking result. My main objective here is to show what changes between each step. Same goes for the size of tiles.
Steps to implement
The tutorial follows mainly 6 steps:
- Define the size of the tile and color the background.
- Draw the horizontal lines.
- Draw the vertical lines.
- Color some planks in a different color.
- Darken some gaps (intersections between horizontal and vertical lines).
- Copy and paste the tile multiple times to get an entire floor texture.
I’ll implement it in a slightly different way:
- Define the size of the tile and color where the planks will be in different colors (Step 1 & 4).
- Draw the horizontal lines.
- Draw the vertical lines.
- Darken some gaps (intersections between horizontal and vertical lines).
- Copy and paste the tile multiple times to get an entire floor texture.
Step 1 and step 4 are done at the same time because when you draw with Konva, you draw in layers.
I could draw the background, the horizontal lines, the vertical lines and then darken some planks but because of the layers, that would require to know where the lines were drawn and their width/height to avoid drawing on the lines.
If I simply draw the planks before anything else, I can draw the lines without worrying of the layers overlapping on the planks.
Draw the planks
Planks are rectangles of different colors drawn one after the others to create the background.
First, I need a function to create rectangles using Konva:
// Takes Konva group & color.
function DrawKonvaRect(group, color) {
    // Returns function that takes coordinates & sizes for rectangle.
    // Adds rectangle of color in group.
    return function (x, y, height, width) {
        // Create new rectangle.
        const rect = new Konva.Rect({
            x: x, y: y,
            width: width, height: height,
            fill: color
        });

        group.add(rect);
    }
}
Then, I draw the planks:
function DrawPlanks(
    // tile sizes
    height, width,
    distanceBetweenPlanks,
    // generate random numbers based on seed
    nextNumber,
    // draw light or dark rectangles (from DrawKonvaRect)
    drawPlank, drawDarkerPlank) {
    let indexHeight = 0;

    // While the height is not reached, draw planks.
    while (indexHeight < height) {
        // Next random number is used to determine plank color.
        const isDefaultPlank = nextNumber() < 0.7;

        // Draw the corresponding plank.
        if (isDefaultPlank) {
            drawPlank(0, indexHeight, distanceBetweenPlanks, width);
        } else {
            drawDarkerPlank(0, indexHeight, distanceBetweenPlanks, width);
        }

        // Increase index to draw next plank.
        indexHeight += distanceBetweenPlanks;
    }
}
nextNumberis a seeded random number generator.
It means that for a specific input, the generator will always return the same numbers in the same order.
Finally, I can generate the planks:
function DrawGroupOntoStage(group, stage) {
    // Need to add group on layer to draw.
    let layer = new Konva.Layer();
    layer.add(group);
    stage.add(layer);
}

// Takes a seed for the generator of random number.
function Generate(seed) {
    // The famous seeded random number generator.
    const genRnd = new Math.seedrandom(seed);
    // Konva group used to add elements.
    let group = new Konva.Group();

    // Use DrawKonvaRect to draw light & dark planks on demand.
    const drawKonvaRectLightPlankColor = DrawKonvaRect(group, defaultPlankColor);
    const drawKonvaRectDarkPlankColor = DrawKonvaRect(group, darkerPlankColor);

    // Add the planks to group.
    DrawPlanks(
        height, width,
        distanceBetweenPlanks, genRnd,
        drawKonvaRectLightPlankColor, drawKonvaRectDarkPlankColor
    );

    // Draw the generated tile.
    DrawGroupOntoStage(group, stage);
}
And there we go!
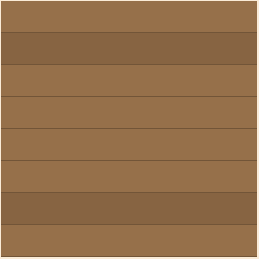
Draw the horizontal lines
The horizontal lines are the horizontal outlines of the planks.
While lines are thin rectangles, instead, I will use Konva.Line to draw the lines.
function DrawKonvaLine(group, color) {
    // Returns function that takes start & end point of the line.
    // Adds line of color in group.
    return function (start, end) {
        const line = new Konva.Line({
            points: [start.x, start.y, end.x, end.y],
            stroke: color,
            // This is the 'height' of the line.
            // Here it is 1 px.
            strokeWidth: 1
        });

        group.add(line);
    }
}
Then, I draw the horizontal outlines.
// Use to create start & end points of line.
function CreatePoint(x, y) {
    return { x, y };
}

function DrawHorizOutlines(
    height, width,
    distanceBetweenPlanks,
    // takes start & end points to draw a line (from DrawKonvaLine)
    drawLine) {
    let indexHeight = 0;

    // For each planks, draw the bottom horizontal outlines.
    while (indexHeight < height) {
        // Next plank
        indexHeight += (distanceBetweenPlanks - 1);

        // 0.5 are for anti-aliasing
        const start = CreatePoint(0, indexHeight + 0.5)
        const end = CreatePoint(width, indexHeight + 0.5)

        drawLine(start, end);
        // Don't forget to add 1 for the line height of 1px.
        indexHeight += 1;
    }
}
The reason I’m using 0.5 is because Canvas calculates from the half of a pixel. For even stroke widths you can use integers for coordinates, for odd stroke widths you want to use 0.5 to get crisp lines that fill the pixels correctly.2
Finally, I add the horizontal outlines to the generation.
function Generate(seed) {
    // ...
    /// Functions to draw planks & outlines.
    // ...
    // Use DrawKonvaLine to draw lines on demand.
    const drawKonvaLine = DrawKonvaLine(group, outlinesPlankColor);

    // After DrawPlanks
    // Add the horizontal outlines to group.
    DrawHorizOutlines(
        height, width,
        distanceBetweenPlanks,
        drawKonvaLine
    );

    DrawGroupOntoStage(group, stage);
}
Draw the vertical lines
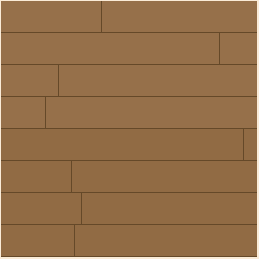
The vertical lines are the vertical outlines of planks. There is always one on each row of planks.
Basic generation
Since I already have what is needed to draw lines, I’ll simply draw the vertical outlines.
function DrawVertOutlines(
    height, width,
    distanceBetweenPlanks,
    nextNumber, drawLine) {
    let indexHeight = 0;

    // Get a random coordinate.
    const getRandomX = () => {
        const max = width - 1;
        const min = 0;

        // Random seeded number returned by nextNumber.
        return Math.floor(nextNumber() * (max - min + 1) + min);
    }

    while (indexHeight < height) {
        // random coordinate for the outline
        let x = getRandomX();

        // anti-aliasing fix
        x += 0.5;

        // top of outline
        const start = CreatePoint(x, indexHeight - 1);
        // bottom of outline
        const end = CreatePoint(x, indexHeight + (distanceBetweenPlanks - 1));

        drawLine(start, end);

        indexHeight += distanceBetweenPlanks;
    }
}
And then I add them to the generation:
function Generate(seed) {
    // ...
    // After DrawHorizOutlines
    // Add the vertical outlines to group.
    DrawVertOutlines(
        height, width,
        distanceBetweenPlanks,
        genRnd, drawKonvaLine
    );

    DrawGroupOntoStage(group, stage);
}
Adjust the outlines
As you can see in the previous results, sometimes it can generate a tile where the vertical outlines are really close from one another. It doesn’t look good.
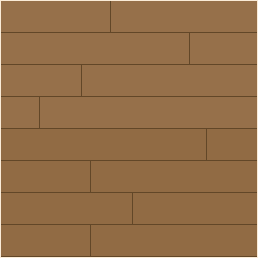
To fix that, I will define a minimum distance to have between two outlines.
// Getting two outlines that are really close to each other is ugly.
// If it happens, an adjustment is needed.
const adjustX = (
    x, previousX,
    distanceBetweenOutlines,
    nextNumber) => {
    const diff = Math.abs(previousX - x);
    let adjustedX = x;

    // Adjust the distance with previous outline.
    if (diff <= distanceBetweenOutlines) {
        // If outline is on the left of previous one.
        adjustedX = x < previousX
            ? previousX - distanceBetweenOutlines
            : previousX + distanceBetweenOutlines;
    }
    // If outline is at the same location than the previous one.
    if (diff === 0) {
        // Randomly decides its location.
        const isOutlineOnLeft = Math.floor(2 * nextNumber()) === 1;
        adjustedX = isOutlineOnLeft
            ? previousX - distanceBetweenOutlines
            : previousX + distanceBetweenOutlines;
    }
    return adjustedX;
}
Update DrawVertOutlines:
// Add distanceBetweenOutlines
function DrawVertOutlines(..., distanceBetweenOutlines, ...) {
    let indexHeight = 0;
    let previousX = -50;

    const getRandomX = () => {
        // Default max & min using distance between outlines
        // to avoid adjusting an outline outside of the tile.
        const max = width - 1 - distanceBetweenOutlines;
        const min = distanceBetweenOutlines;

        // Random seeded number returned by nextNumber
        return Math.floor(nextNumber() * (max - min + 1) + min);
    }

    while (indexHeight < height) {
        let x = getRandomX();

        // Adjust the X if needed
        x = adjustX(x, previousX, distanceBetweenOutlines, nextNumber);
        previousX = x;
        // ...
    }
}
And Generate:
function Generate(seed) {
    // ...
    // Add distanceBetweenOutlines
    DrawVertOutlines(
        height, width,
        distanceBetweenPlanks, distanceBetweenOutlines,
        genRnd, drawKonvaLine
    );
    // ...
}
Here is the result with the same seed as in the previous image.
Darken gaps
I want to darken some gaps because it gives the floor texture a worn appearance. It feels a bit more natural. What I call a gap is an intersection between a horizontal outline and a vertical outline.
Get the intersections
Before going into darkening the intersections, I need to collect those intersections. I can collect them while I draw the vertical outlines. To do that, I’ll just need to add the start and end of each vertical outline to a list of intersections.
function DrawVertOutlines(
    height, width,
    distanceBetweenPlanks, distanceBetweenOutlines,
    nextNumber, drawLine) {
    // ...
    let intersections = [];

    // ...
    while (indexHeight < height) {
        // ...
        // Add new intersections.
        intersections = [
            ...intersections,
            [start, end]
        ];
    }

    return intersections;
}
Once I have the intersections, I can get into drawing them.
Basic darkening and spreading of intersections
Darkening an intersection is the same as drawing a “T” with longer or shorter branches on the left, bottom and right.
function DrawKonvaLetterT(group, color) {
    const drawLine = DrawKonvaLine(group, color);

    return function (
        // top left/right end of the "T"
        leftPoint, rightPoint,
        // top/bottom center end of the "T"
        centerPoint, bottomPoint) {
        drawLine(leftPoint, rightPoint);
        drawLine(centerPoint, bottomPoint);
    }
}
I also define a function to get a seeded random number between a minimum and a maximum.
// Get seeded random number between min & max.
const GetNextNumber = (nextNumber, min, max) =>
    Math.floor(nextNumber() * (max - min) + min);
I want to set the vertical spreading of intersections.
/// Vertical spreading
// Get points from intersection.
// Reminder that an intersection is a vertical outline.
const getTopPoint = (intersection) => intersection[0];
const getBottomPoint = (intersection) => intersection[1];
// Vertical spreading based on a point.
const verticalSpreadingFromPoint = (point, spreading) => ({
    center: CopyPoint(point),
    bottom: CreatePoint(point.x, point.y + spreading)
});

function setVerticalSpreading(
    intersection, nextNumber,
    minVertSpread, maxVertSpread) {
    // Should darken top intersection of outline?
    const shouldDarkenTop = nextNumber() > 0.5;
    const direction = (shouldDarkenTop ? 1 : -1);
    const vertSpread =
        GetNextNumber(nextNumber, minVertSpread, maxVertSpread) * direction;
    const chosenPoint = shouldDarkenTop
        ? getTopPoint(intersection)
        : getBottomPoint(intersection);

    return verticalSpreadingFromPoint(chosenPoint, vertSpread);
}
Obviously, I also want the horizontal spreading of intersections.
/// Horizontal spreading
function setHorizontalSpreading(
    centerPoint, nextNumber,
    minHorizSpread, maxHorizSpread) {
    // Formula to determine how much left/right branches spread.
    const computeBranchSpreading =
        () => GetNextNumber(nextNumber, minHorizSpread, maxHorizSpread);
    let leftSpreading = computeBranchSpreading();
    let rightSpreading = computeBranchSpreading();

    // Anti-aliasing fix.
    const tmpHorizPoint = CreatePoint(centerPoint.x - 0.5, centerPoint.y + 0.5);

    // Left/right spread of intersection for "T".
    return {
        left: CreatePoint(tmpHorizPoint.x - leftSpreading, tmpHorizPoint.y),
        right: CreatePoint(tmpHorizPoint.x + rightSpreading, tmpHorizPoint.y)
    };
}
Then, I draw the intersections.
function DrawIntersections(
    distanceBetweenOutlines, distanceBetweenPlanks,
    intersections,
    nextNumber, drawLetterT) {
    // min/max spreading
    // Spreading is how far intersection is darkened.
    const maxVertSpread = Math.floor(distanceBetweenPlanks / 2);
    const minVertSpread = Math.floor(maxVertSpread / 4);
    const maxHorizSpread = distanceBetweenOutlines / 2;
    const minHorizSpread = Math.floor(maxHorizSpread / 3);

    intersections.forEach((intersection) => {
        // Should intersection be darkened?
        const shouldBeDarkened = nextNumber() < 0.5;
        if (!shouldBeDarkened) {
            return;
        }

        // Vertical spread
        const { center, bottom } = setVerticalSpreading(
            intersection, nextNumber,
            minVertSpread, maxVertSpread);

        // Horizontal spread
        const { left, right } = setHorizontalSpreading(
            center, nextNumber,
            minHorizSpread, maxHorizSpread
        );

        // Draw the "T" that will "darken" the intersection.
        drawLetterT(left, right, center, bottom);
    });
}
Finally, I add it to the generation.
function Generate(seed) {
    // ...
    /// Functions to draw planks & outlines.
    // ...
    // Draw a letter "T" on demand (from DrawKonvaLetterT).
    const drawKonvaLetterT = DrawKonvaLetterT(group, intersectionColor);

    // ...
    // Get the intersections from vertical outlines..
    const intersections = DrawVertOutlines(
        height, width,
        distanceBetweenPlanks, spaceBetweenVertOutlines,
        genRnd, drawKonvaLine
    );

    // Add intersections to group
    DrawIntersections(
        spaceBetweenVertOutlines, distanceBetweenPlanks,
        intersections,
        genRnd, drawKonvaLetterT
    );

    DrawGroupOntoStage(group, stage);
}
Adjust spreading
In the previous results, dark intersections are correctly spread but sometimes two dark intersections are really close from one another but are not completing each other. It looks weird.
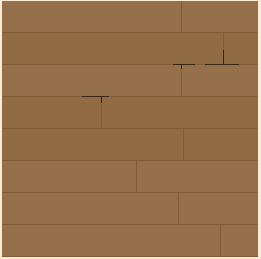
To fix that, I’ll check if the current intersection to darken is on the same outline than the previous one. If it’s the case and both are not too far from one another, I’ll simply update the corresponding left/right point of the current intersection to the center point of the previous intersection.
function shouldIntersectionsBeConnected(
    point, previous,
    distanceBetweenOutlines) {
    let result = {
        shouldBeConnected: false,
        isLeftPoint: false
    };

    // If previous intersection is not on same abscissa as current one.
    if (previous.y !== point.y) {
        return result;
    }

    // If diff > 0, previous is on left.
    // If diff < 0, previous is on right.
    const diff = point.x - previous.x;
    const shouldBeConnected = Math.abs(diff) <= distanceBetweenOutlines;

    return {
        shouldBeConnected,
        isLeftPoint: diff > 0
    }
}
Update setHorizontalSpreading to make use of the previous function:
// Add previous & distanceBetweenOutlines
function setHorizontalSpreading(..., previous, distanceBetweenOutlines, ...) {
    // ...
    // If intersections should be connected.
    const { shouldBeConnected, isLeftPoint } =
        shouldIntersectionsBeConnected(centerPoint, previous, distanceBetweenOutlines);

    // Set the left/right spreading.
    if (shouldBeConnected) {
        const diff = Math.abs(previous.x - centerPoint.x);
        if (isLeftPoint) {
            leftSpreading = diff;
        } else {
            rightSpreading = diff;
        }
    }
    // ...
}
Finally, propagate the change on DrawIntersections:
function DrawIntersections(...) {
    // ...
    // Previous darkened intersection.
    let previous = CreatePoint(-50, -50);

    intersections.forEach((intersection) => {
        // ...
        // Horizontal spread
        const { left, right } = setHorizontalSpreading(
            center, previous,
            distanceBetweenOutlines, nextNumber,
            minHorizSpread, maxHorizSpread
        );

        // Draw the "T" that will "darken" the intersection.
        drawLetterT(left, right, center, bottom);

        // Update previous intersection.
        previous = center;
    });
}
Here we go!
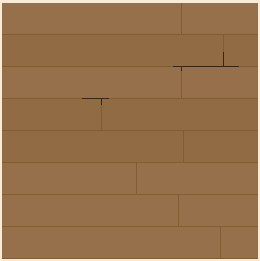
Preview
Now that we can generate a tile, it would be nice to see how it looks as an entire floor.
The easiest way to do this is to copy/paste the tile a bunch of times. And that’s how I’ll do it.
function GeneratePreview(width, height, tile, stage, scale) {
    const cloneTile = (tile, x, y) =>
        (tile.clone({ x, y }));

    // Used to copy/paste tile on layer.
    let layer = new Konva.Layer();

    for (let x = 0; x < width * scale; x += width) {
        for (let y = 0; y < height * scale; y += height) {
            // Copy & Paste the tile.
            const clone = cloneTile(tile, x, y);
            layer.add(clone);
        }
    }

    // Draw the preview.
    stage.add(layer);
}
We add GeneratePreview at the end of Generate. Here is the final version:
function Generate(seed) {
    // Seeded random number generator.
    const genRnd = new Math.seedrandom(seed);

    /// Konva groups
    // Planks & horizontal outlines are reusable for variations.
    let group = new Konva.Group();

    /// Functions to draw planks & outlines.
    const drawKonvaRectLightPlankColor = DrawKonvaRect(group, defaultPlankColor);
    const drawKonvaRectDarkPlankColor = DrawKonvaRect(group, darkerPlankColor);
    const drawKonvaLine = DrawKonvaLine(group, outlinesPlankColor);
    // Draw a letter "T" on demand (from DrawKonvaLetterT).
    const drawKonvaLetterT = DrawKonvaLetterT(group, intersectionColor);

    // Add planks to group.
    DrawPlanks(
        height, width,
        distanceBetweenPlanks, genRnd,
        drawKonvaRectLightPlankColor, drawKonvaRectDarkPlankColor
    );

    // Add horizontal outlines to group.
    DrawHorizOutlines(
        height, width,
        distanceBetweenPlanks,
        drawKonvaLine
    );

    // Add vertical outlines to group.
    // Remove first because no horizontal outline at the top.
    const [, ...intersections] = DrawVertOutlines(
        height, width,
        distanceBetweenPlanks, spaceBetweenVertOutlines,
        genRnd, drawKonvaLine
    );

    // Add intersections to group.
    DrawIntersections(
        spaceBetweenVertOutlines, distanceBetweenPlanks,
        intersections,
        genRnd, drawKonvaLetterT
    );

    // Draw the generated tile.
    DrawGroupOntoStage(group, stage);

    // Draw the preview.
    GeneratePreview(width, height, group, previewStage, previewScale);
}
And here we have some neat preview!
Code & Demo
- You can play around with the demo of the final version on codepen.io.
- You can find the code of the final version on Github.